こんばんは。ざわです。
今回もタイトル通り、XAMLネタです。
過去履歴はこちら。
動作環境
・Windows10
・Microsoft Visual Studio Community 2022 Preview 7.0
・Xamarin.Forms
今回試してみたこと
本日は「ResourceDictionary」について書いてみようと思います。
コントロールには色やサイズ、フォント等々の属性を設定しますが
コントロール毎に設定するのは手間がかかりますし、
変更したい場合、各コントロールに同じような変更を反映していくのはやってられないので
Styleを定義してそちらを使うことにします。
まず、コンテンツページにラベル、テキストボックス、ボタンを配置し
属性を設定して見た目を整えます。
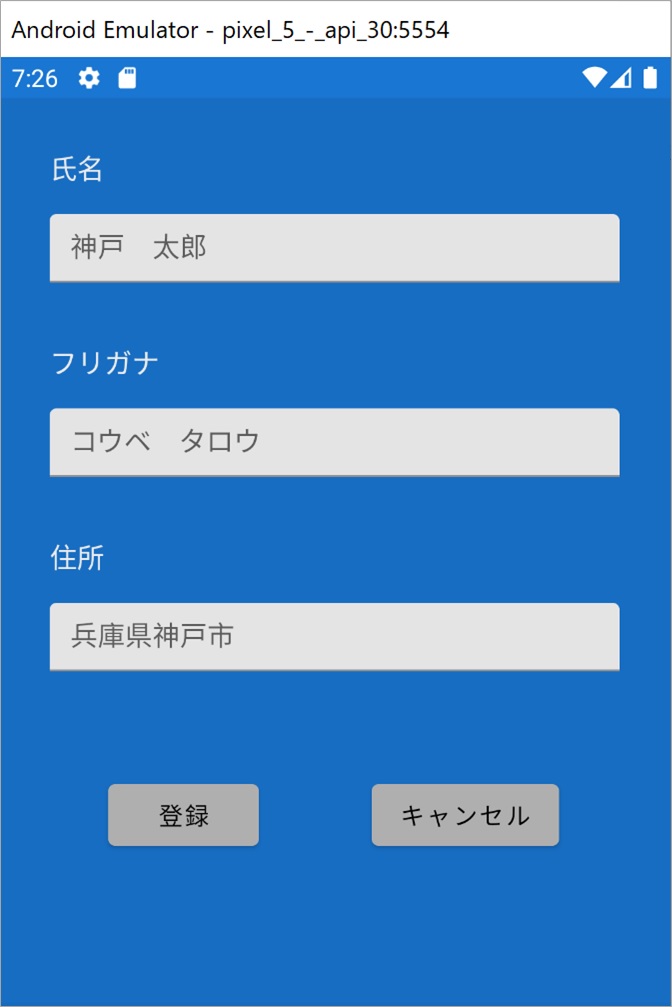
「ResourceDictionary」を使う前のソースはこれです。
<StackLayout BackgroundColor="#1976d2">
<Label Text="氏名" TextColor="White" FontSize="16" Margin="30, 30, 30, 10" />
<Entry Placeholder="神戸 太郎" x:Name="txtName"
FontSize="16" HeightRequest="40" Margin="30, 0, 30, 0" />
<Label Text="フリガナ" TextColor="White" FontSize="16" Margin="30, 30, 30, 10" />
<Entry Placeholder="コウベ タロウ" x:Name="txtKana"
FontSize="16" HeightRequest="40" Margin="30, 0, 30, 0"/>
<Label Text="住所" TextColor="White" FontSize="16" Margin="30, 30, 30, 10" />
<Entry Placeholder="兵庫県神戸市" x:Name="txtAddress"
FontSize="16" HeightRequest="40" Margin="30, 0, 30, 0"/>
<StackLayout Orientation="Horizontal" HorizontalOptions="Center" Margin="0,60">
<Button Text="登録" x:Name="btnRegist"
BackgroundColor="#bdbdbd" TextColor="Black" Margin="30, 0, 30, 0"/>
<Button Text="キャンセル" x:Name="btnCancel"
BackgroundColor="#bdbdbd" TextColor="Black" Margin="30, 0, 30, 0"/>
</StackLayout>
</StackLayout>
1. 「ResourceDictionary」で属性設定
以下のように編集します。
① <ContentPage.Resources>~</ContentPage.Resources>の箇所を追加
・Style要素の x:Key 属性には一意の文字列キー、
TargetType 属性にはコントロールの種類を定義します。
<Style x:Key="labelStyle" TargetType="Label">
・Setter要素に設定したい属性とその値を設定します。
<Setter Property="TextColor" Value="White" />
② 各コントロールの FontSize等の属性を削除し、代わりに Style属性を追加し
以下の赤字部分のように①でKey属性に定義した文字列キーを設定します。
<Label Text="氏名" Style="{StaticResource labelStyle}" />
<ContentPage.Resources>
<ResourceDictionary>
<Color x:Key="PageBackgroundColor">#1976d2</Color>
<Style x:Key="labelStyle" TargetType="Label">
<Setter Property="TextColor" Value="White" />
<Setter Property="FontSize" Value="16" />
<Setter Property="Margin" Value="30, 30, 30, 10" />
</Style>
<Style x:Key="entryStyle" TargetType="Entry">
<Setter Property="FontSize" Value="16" />
<Setter Property="HeightRequest" Value="40" />
<Setter Property="Margin" Value="30, 0, 30, 0" />
</Style>
<Style x:Key="buttonStyle" TargetType="Button">
<Setter Property="BackgroundColor" Value="#bdbdbd" />
<Setter Property="TextColor" Value="Black" />
<Setter Property="Margin" Value="30, 0, 30, 0" />
</Style>
</ResourceDictionary>
</ContentPage.Resources>
<StackLayout BackgroundColor="{StaticResource PageBackgroundColor}">
<Label Text="氏名" Style="{StaticResource labelStyle}" />
<Entry Placeholder="神戸 太郎" x:Name="txtName" Style="{StaticResource entryStyle}" />
<Label Text="フリガナ" Style="{StaticResource labelStyle}" />
<Entry Placeholder="コウベ タロウ" x:Name="txtKana" Style="{StaticResource entryStyle}" />
<Label Text="住所" Style="{StaticResource labelStyle}" />
<Entry Placeholder="兵庫県神戸市" x:Name="txtAddress" Style="{StaticResource entryStyle}" />
<StackLayout Orientation="Horizontal" HorizontalOptions="Center" Margin="0,60">
<Button Text="登録" x:Name="btnRegist" Style="{StaticResource buttonStyle}" />
<Button Text="キャンセル" x:Name="btnCancel" Style="{StaticResource buttonStyle}" />
</StackLayout>
</StackLayout>
編集後の実行結果も「ResourceDictionary」を使う前と同じになります。
このサンプルはページレベル(ContentPage.Resources)ですが、
アプリケーションレベルで設定する場合は App.xaml の <Application.Resources>内に
上記サンプルの<ResourceDictionary>~</ResourceDictionary> の部分と同じように設定すればOKです。
(Application.Resources と ContentPage.Resources に同じキーが設定されている場合は、ContentPage.Resources のほうが有効)
2. 暗黙的スタイルを使った場合
上記サンプルはStyle宣言時に「x:Key」属性を明示的に定義していますが、
「x:Key」属性を定義せずに暗黙的に設定することも可能です。
その場合は「TargetType」属性に指定したコントロールに対してスタイルが適用されます。
試しに、ボタン コントロールの設定を暗黙的な設定のほうに変更してみます。
コメントのほうが明示的、コメントなしのほうが暗黙的。
(ついでにボタンの色をグレーからピンクに変更しています)
<!--<Style x:Key="buttonStyle" TargetType="Button">
<Setter Property="BackgroundColor" Value="#bdbdbd" /><Setter Property="TextColor" Value="Black" /><Setter Property="Margin" Value="30, 0, 30, 0" /></Style>--><Style TargetType="Button"><Setter Property="BackgroundColor" Value="#ea80fc" /><Setter Property="TextColor" Value="Black" /><Setter Property="Margin" Value="30, 0, 30, 0" /></Style>
<StackLayout Orientation="Horizontal" HorizontalOptions="Center" Margin="0,60"><!--<Button Text="登録" x:Name="btnRegist" Style="{StaticResource buttonStyle}" /><Button Text="キャンセル" x:Name="btnCancel" Style="{StaticResource buttonStyle}" />--><Button Text="登録" x:Name="btnRegist" /><Button Text="キャンセル" x:Name="btnCancel" /></StackLayout>
(実行結果)

3. ResourceDictionaryファイルを使った場合
上記のようにページに<ContentPage.Resources> や <Application.Resources> を定義する方法ではなく、ResourceDictionaryファイルを使うこともできるようです。
設定の流れは、
1. プロジェクトに[追加]→[新しい項目]でコンテンツページを追加
ファイル名:MyResourceDictionary.xaml
2. MyResourceDictionaryのコードビハインドファイル(MyResourceDictionary.xaml.cs)を削除
3. xamlファイルでベース・クラスの名前を ContentPage から ResourceDictionary に変更(下記サンプルの赤字箇所)
4. xamlファイルのルートタグから x:Class 属性を削除 (下記サンプルの赤字箇所)
不要な<ContentPage.Content>~</ContentPage.Content>の部分も削除
5. 下記サンプルの変更後のように、Styleの設定を追加
■MyResourceDictionary.xaml : 変更前
<?xml version="1.0" encoding="utf-8" ?><ContentPage xmlns="http://xamarin.com/schemas/2014/forms"xmlns:x="http://schemas.microsoft.com/winfx/2009/xaml"x:Class="App6.MyResourceDictionary"><ContentPage.Content><StackLayout><Label Text="Welcome to Xamarin.Forms!"VerticalOptions="CenterAndExpand"HorizontalOptions="CenterAndExpand" /></StackLayout></ContentPage.Content></ContentPage>
■MyResourceDictionary.xaml : 変更後
<?xml version="1.0" encoding="utf-8" ?><ResourceDictionary xmlns="http://xamarin.com/schemas/2014/forms"xmlns:x="http://schemas.microsoft.com/winfx/2009/xaml"><Color x:Key="PageBackgroundColor">GreenYellow</Color><Style x:Key="labelStyle" TargetType="Label"><Setter Property="TextColor" Value="Black" /><Setter Property="FontSize" Value="16" /><Setter Property="Margin" Value="30, 30, 30, 10" /></Style><Style x:Key="entryStyle" TargetType="Entry"><Setter Property="FontSize" Value="16" /><Setter Property="HeightRequest" Value="40" /><Setter Property="Margin" Value="30, 0, 30, 0" /></Style><Style x:Key="buttonStyle" TargetType="Button"><Setter Property="BackgroundColor" Value="#bdbdbd" /><Setter Property="TextColor" Value="Black" /><Setter Property="Margin" Value="30, 0, 30, 0" /></Style></ResourceDictionary>
6.入力項目やボタン等を配置したほうのコンテンツページにResourceDictionaryファイルの定義を追加(下記サンプルの赤字箇所)
<ContentPage.Resources><ResourceDictionary Source="MyResourceDictionary.xaml" /></ContentPage.Resources><StackLayout BackgroundColor="{StaticResource PageBackgroundColor}"><Label Text="氏名" Style="{StaticResource labelStyle}" /><Entry Placeholder="神戸 太郎" x:Name="txtName" Style="{StaticResource entryStyle}" /><Label Text="フリガナ" Style="{StaticResource labelStyle}" /><Entry Placeholder="コウベ タロウ" x:Name="txtKana" Style="{StaticResource entryStyle}" /><Label Text="住所" Style="{StaticResource labelStyle}" /><Entry Placeholder="兵庫県神戸市" x:Name="txtAddress" Style="{StaticResource entryStyle}" /><StackLayout Orientation="Horizontal" HorizontalOptions="Center" Margin="0,60"><Button Text="登録" x:Name="btnRegist" Style="{StaticResource buttonStyle}" /><Button Text="キャンセル" x:Name="btnCancel" Style="{StaticResource buttonStyle}" /></StackLayout></StackLayout>
(実行結果 : 違いが分かるようにページの背景色を黄緑色に変更しています)

今回は StaticResource の方法でいくつか試してみましたが、動的なDynamicResource を使う方法などもあるようですね。
今日はこれにて。それではまた。
0 件のコメント:
コメントを投稿